Cloud Frugality: How to reduce >99% of your small-scale semi-static website costs?


Most people believe that cloud is always more expensive than all other options. That is probably true if you don't see how to combine the right offers to achieve more. Cloud is about getting more bang for your bucks, meaning you get a lot of added value. One life lesson I can give you: Don't listen to people who have never paid a single cloud bill. Don't be cheap, be frugal!
I will use my blog as a cost optimization case study.
What services did I previously use for my blog?
I needed at least Basic tier of Azure App Service to run my blog. Reasons for that are Custom domain name, Always On and Web jobs. I utilized Web jobs for SSL certificate management using the Let's Encrypt Site Extension.

What do I use now?
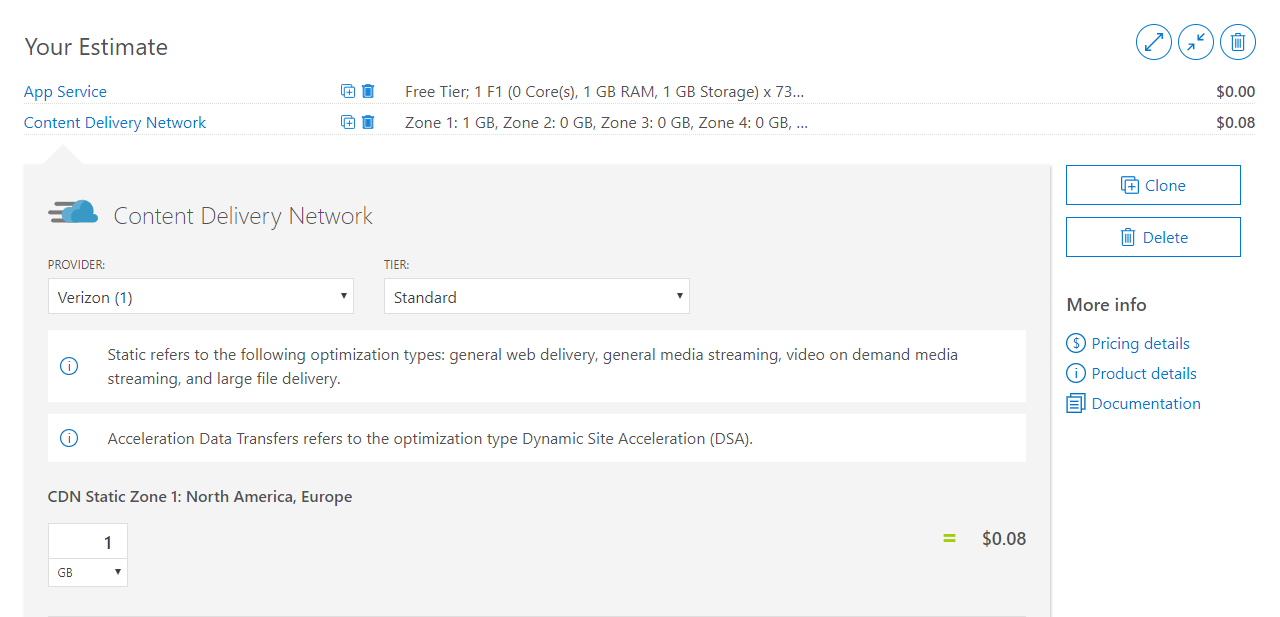
I decided to put Azure CDN as a reverse proxy in front of my blog. The reason is that it's really cheap for low traffic websites and it's globally available. It allows me to scale down my Basic App Service to Free. I pay about $0.10 per month for my blog without sacrificing the SLA! It even performs better globally because of Azure CDN. Isn't that super cool?
How to set it up?
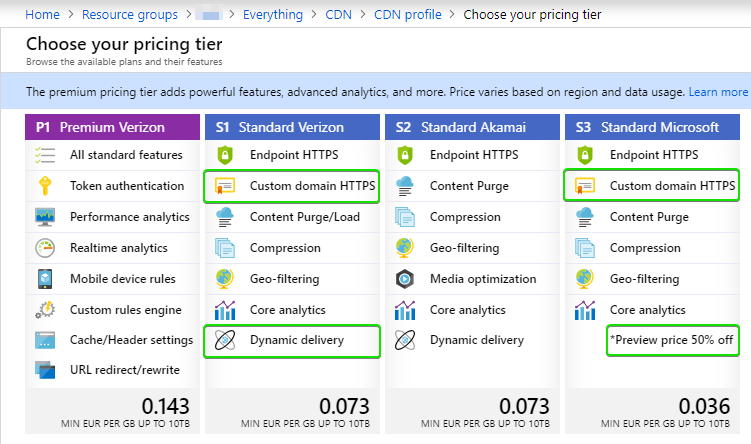
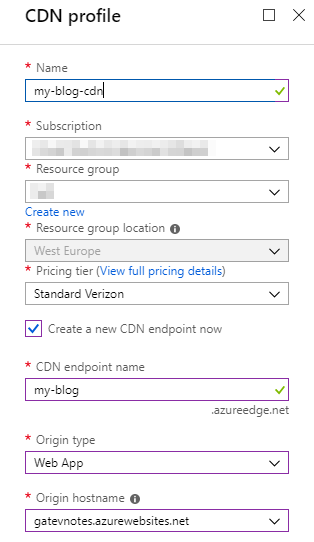
- Create an Azure CDN resouce. I chose the Standard Verizon pricing tier as it offers Custom domain HTTPS and Dynamic Delivery. Wait, that's practically a DigiCert SSL certificate for free! So, I don't need to have a web job to manage Let's Encrypt certificates.
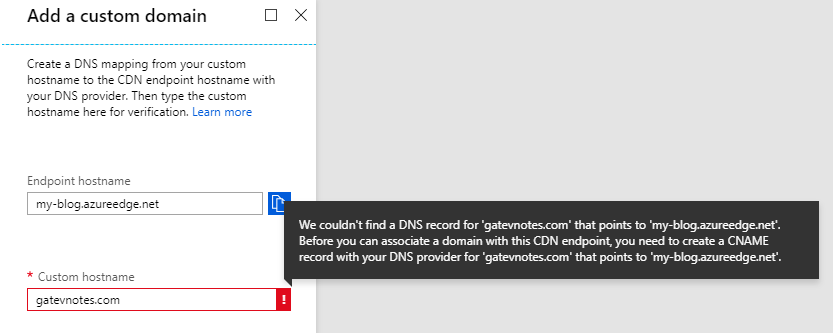
- While your endpoint is being propagated globally(and it takes some time), go to the Endpoint in your CDN profile and add a Custom domain. You have to create a CNAME record which points to your-cdn.azureedge.net in you DNS.
- Make sure you can read emails sent to admin@yourwebsite.com. You can use email forwarding for free on most domain registers. Youn need to do this because of the next step. DigiCert CA will try to contact the domain owner using the WHOIS info. But if that's private, they will send a validation email to admin@yourwebsite.com.
- Enable HTTPS on you custom domain
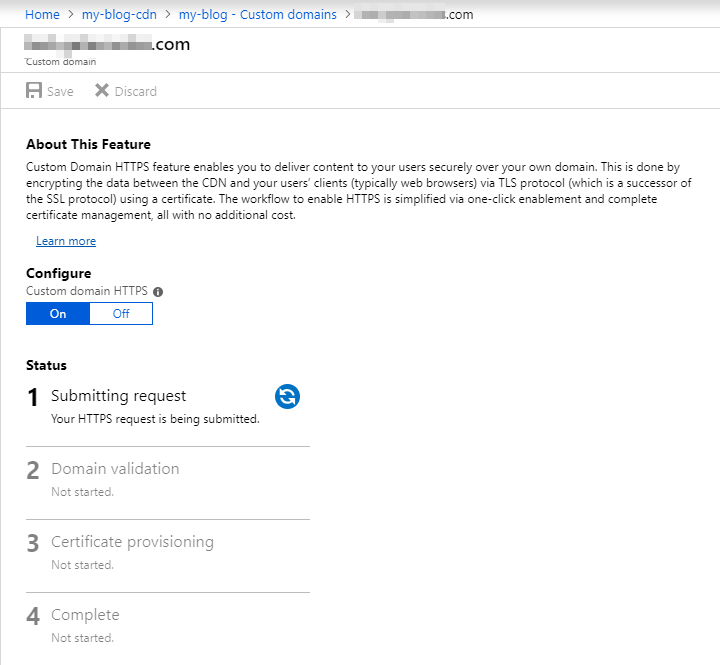
More info on the process: https://docs.microsoft.com/en-us/azure/cdn/cdn-custom-ssl - Wait patiently as it takes time! And don't ever think to cancel it as it will take the same amount of time to revert changes!
- Remove any WWW/HTTPS redirects from you web.config as your-site.azurewebsites.net should be accessible.
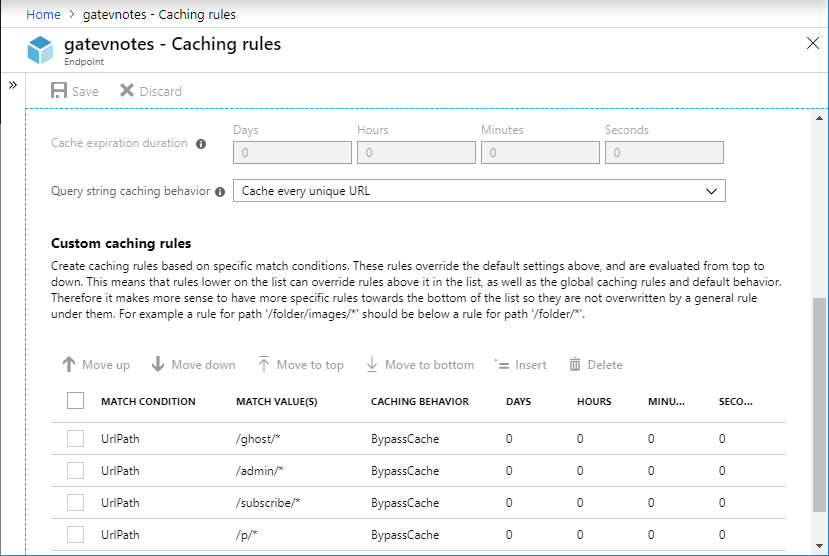
- If you use Ghost, you can add some custom caching rules, as I did. Also, you can set up caching for your Ghost frontend.
Now you need a good DNS
I used GoDaddy's DNS before but I found out that it doesn't support creating CNAME records for the root of your domain. The DNS Standards don't allow this - see RFC 1912 and RFC 2181 for more info. But there are some ways to circumvent this limitation and some DNS providers support it. This is the so-called ALIAS record which is a virtual CNAME record for apex domains. It behaves like an A record but it basically pings the hostname and monitors its current IP address.
The DNS provider must also support HTTPS redirects.
I chose Cloudflare as they have a free offering.
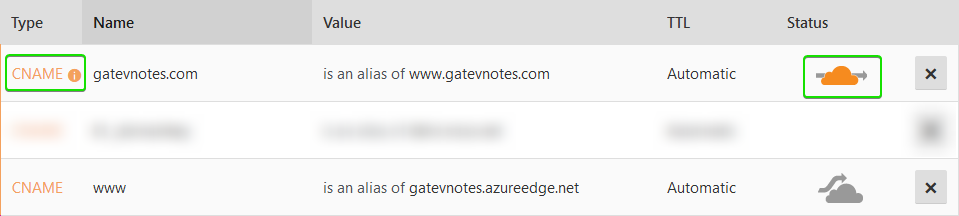
My DNS records are:
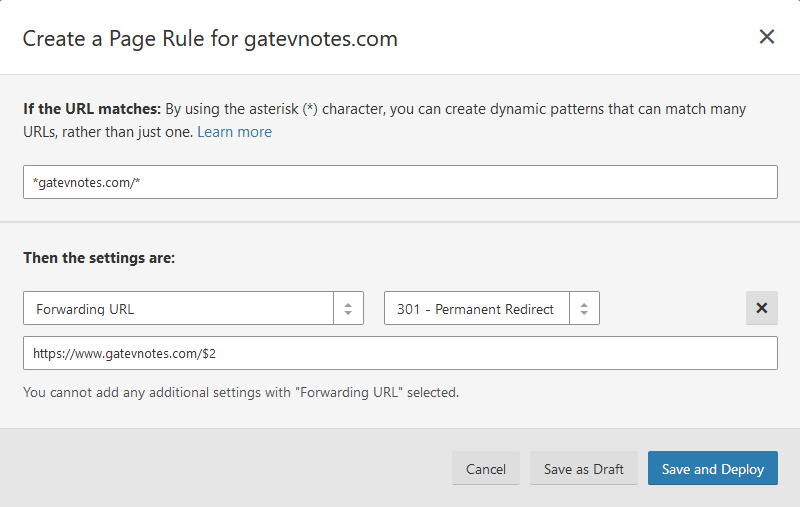
I really don't want to make my blog accessible from multiple URLs. It's not good from SEO perspective, although Ghost provides a canonical tag. So let's configure a redirect:
You can also configure SSL, HTTPS-only, and HSTS from the Crypto menu in Cloudflare.