How to uncover the names and parameters of blades in Azure Portal


Azure Portal has its functionality organized in blades and extensions. Blades are the visual parts you play with, while extensions serve as the logical module that contains blades and are typically paired with Azure Resource Providers so that an extension provides the necessary UI bits and pieces for an Azure Resource Provider.
Some parts of the Azure Portal functionality make sense to be reused by the UI of your template specs. To learn more about how to invoke blades, check out Using Azure Portal blades in the Template Specs UI.
Azure Portal is among the biggest (if not the biggest) applications in the world based on Knockout.js which used to be one of the best frameworks that helps you leverage data binding in your applications by applying the Model-View-ViewModel (MVVM) pattern. This was a game changer back in 2012 and is what laid the foundation of the modern front-end frameworks. Now, don't get me wrong, I haven't moved to front-end development. As an architect and developer, my work requires versatility and problem-solving across different domains. It’s challenging to describe all my responsibilities, but let’s focus on the main subject for now.
Finding out the blade and extension names
Your best friend for the next steps will be the DevTools in your browser. Hit F12 and let's get started:
- Go to the Azure Portal.
- Make sure you open the blade in question. The portal loads its stuff on demand and you need the blade to be loaded to be able to find it.
- Keep an eye on the Console tab where the extension name is typically logged, e.g.
Extension: WebsitesExtension. - Execute the following code snippet in the Console:
const allElements = document.getElementsByTagName("*"); for (const element of allElements) { const context = ko.contextFor(element); if (context && context["$partName"] !== undefined && context["$extensionName"] !== undefined) { console.log(`Extension: ${context["$extensionName"]}, ` + `Blade/Part: ${context["$partName"]}`); } } - The code snippet above loops through all elements on the page that have a Knockout.js binding context. It tries to obtain the name of the blade and the name of the extension it belongs to. A blade consists of many elements, so the same logs are repeated a lot, but that's okay:
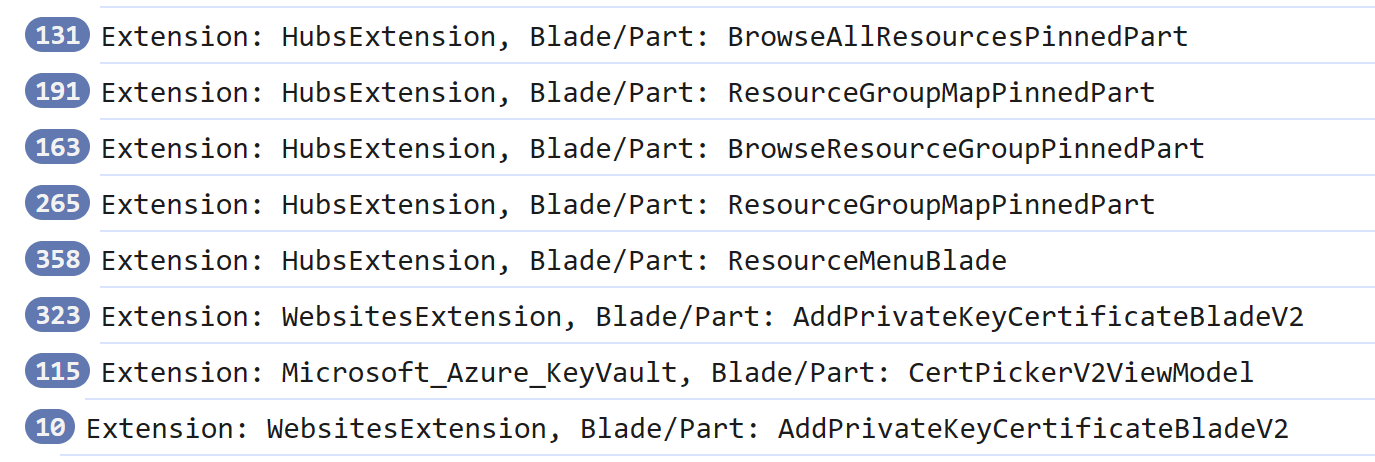
- You can probably identify the blade you need, by looking at their names which seem to be self-explanatory.
Congrats if you've found them! If not, then most likely the blade is loaded in an iframe so the code is technically loaded as a document in another browsing context. That is the case with Entra ID ObjectPickerBlade.
Figuring out the blade parameters
This is not so straightforward as you will have to read through the Azure Portal's implementation right from the sources tab in DevTools. The code of the Azure Portal is somewhat minified but it still makes sense as some names are retained.
The first step is to locate the Search tool to scan for all references and the implementation of the blade in question. The tool can find text across all loaded resources. Here are the results for CertPickerV2ViewModel for example:
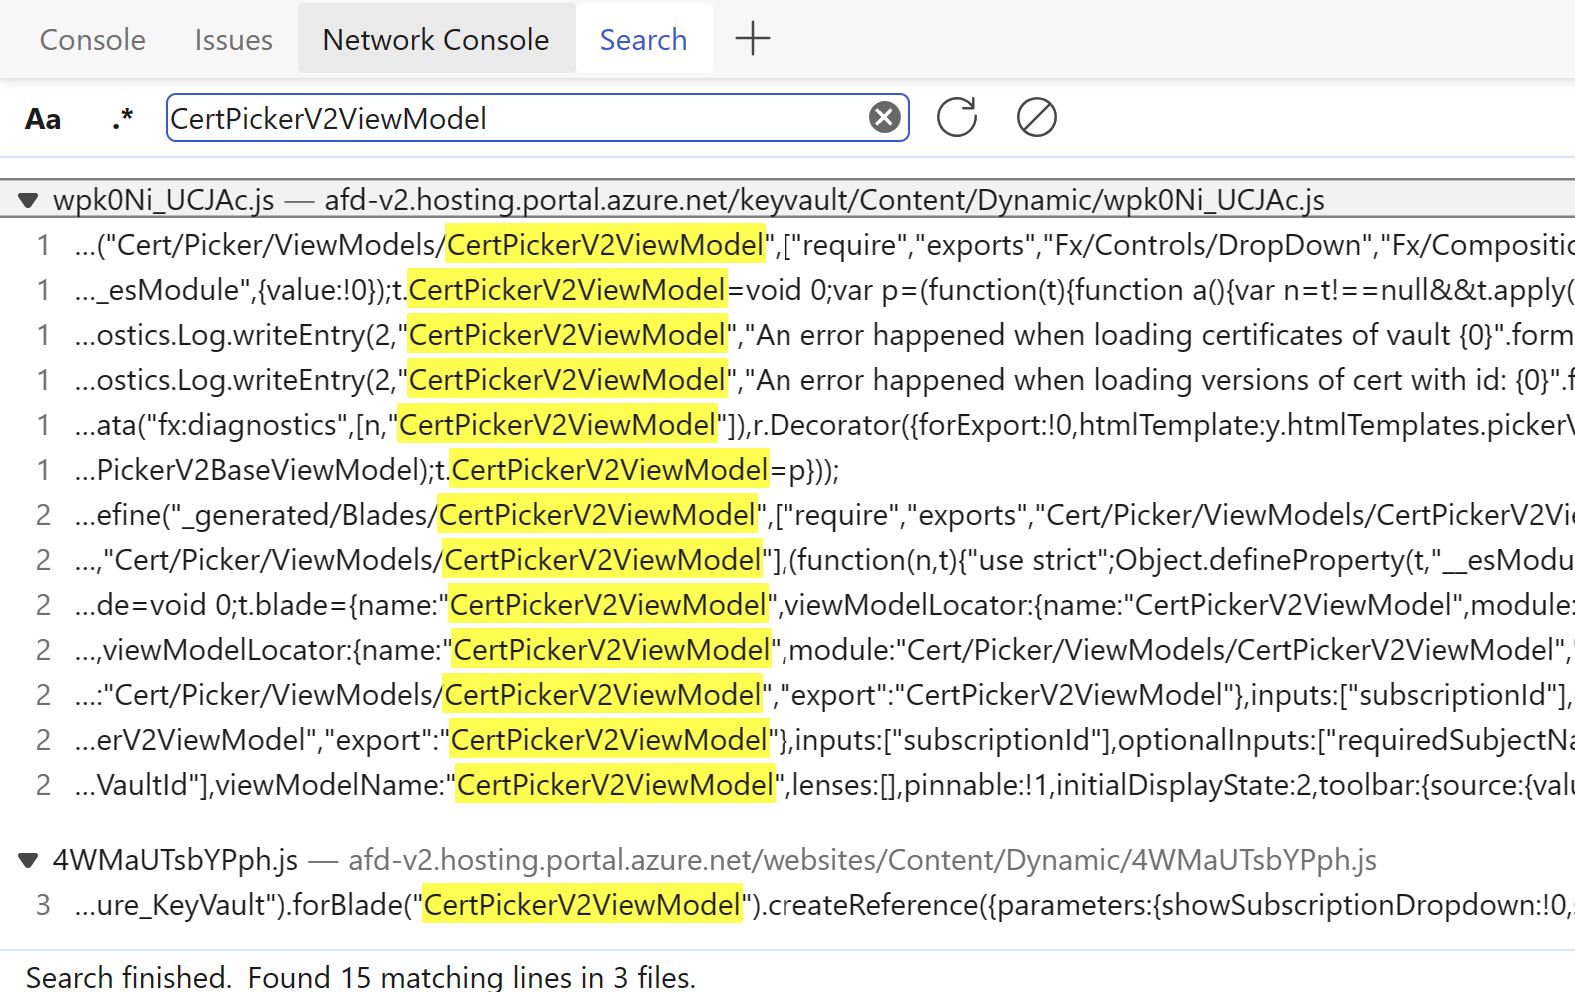
Next, you have to find the implementation among all search results. If it's like BladeReferences.forExtension("Microsoft_Azure_KeyVault").forBlade("CertPickerV2ViewModel").createReference, then that is just a reference where the blade is actually used. Therefore, you will not be able to see all available parameters as there might be some optional ones.
But if the line starts like define("_generated/Blades/CertPickerV2ViewModel", ["require", "exports", "Cert/Picker/ViewModels/CertPickerV2ViewModel"], (function(n, t) { ..., you have most likely found the implementation. That's the blade specified defined as a RequireJS module.
Take a look at the inputs and optionalInputs that define required and optional parameters, respectively.
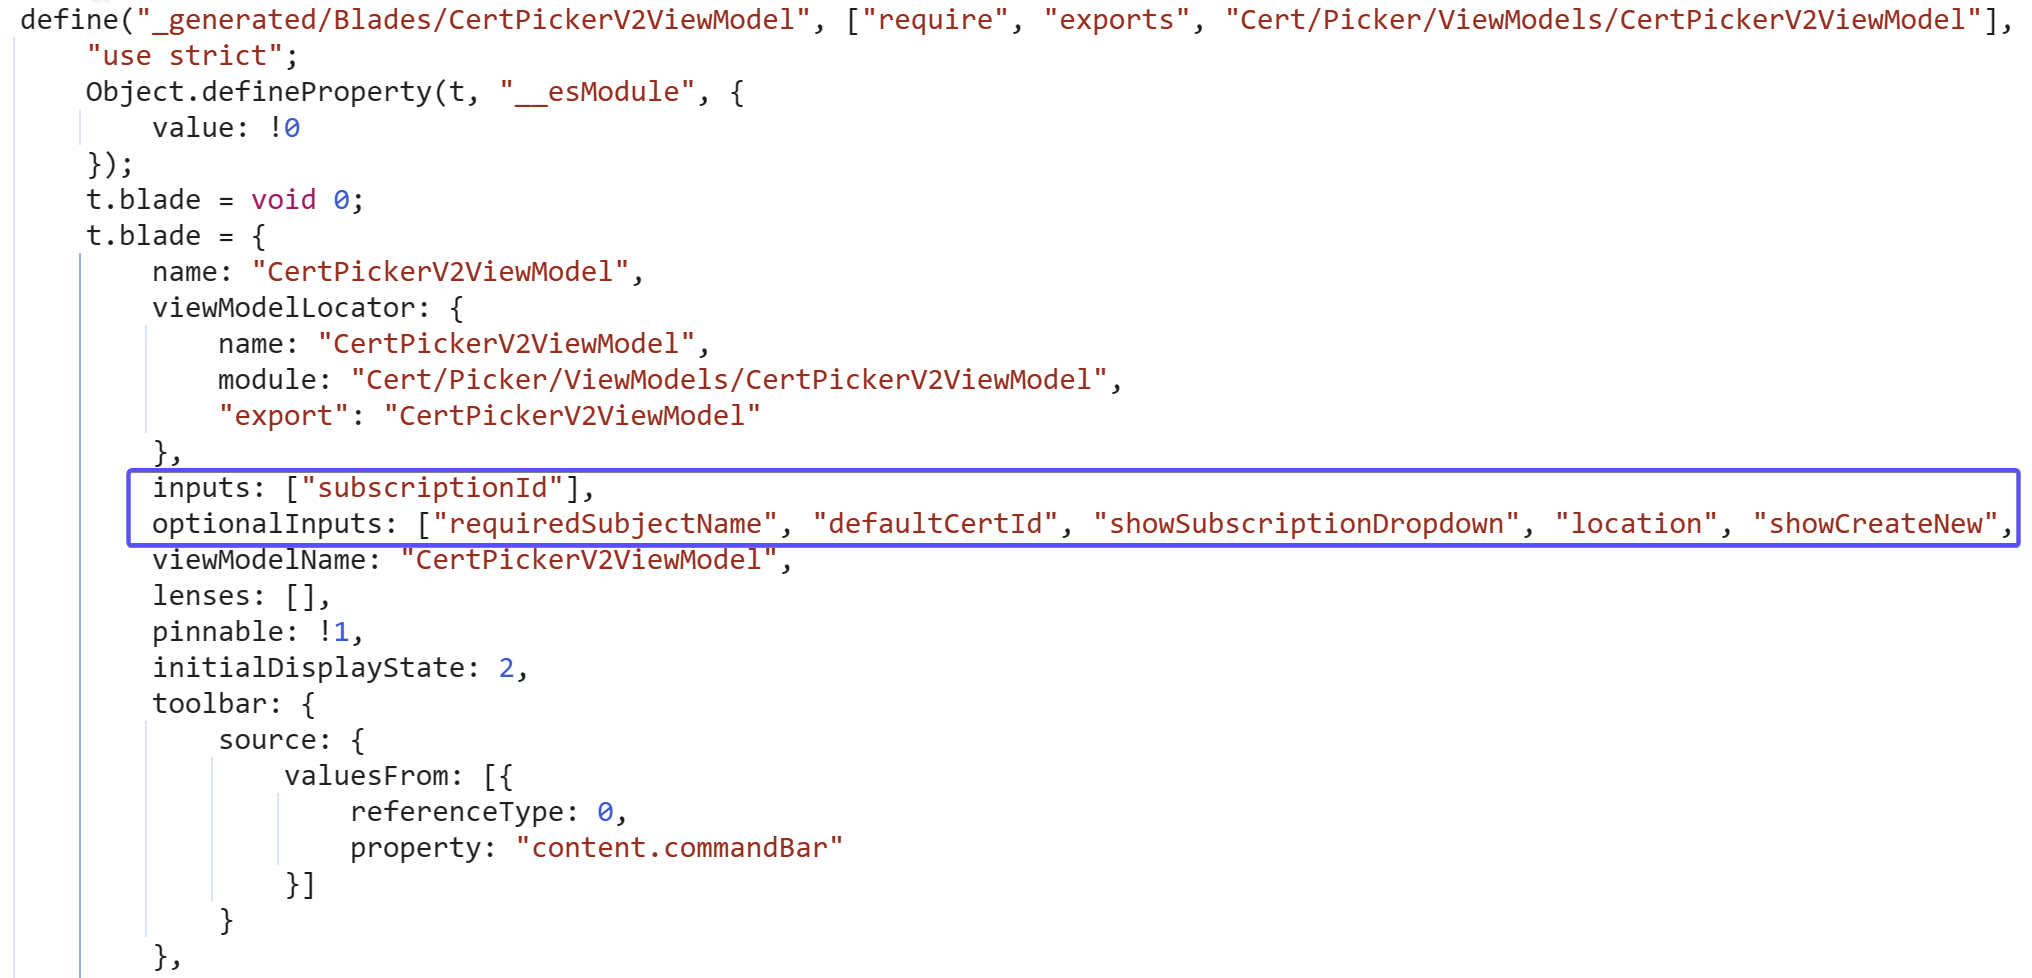
To find out what each parameter does, you will have to dive deeper into the implementation of the ViewModel that is most likely in the same file.